Welcome Fall (Meteorologically Speaking)
I prefer to follow the seasons as the meteorologists do, and I have to admit that come September 1st, I am fairly sick of summer. Bring on the cooler temperatures! Thus, this is always the day I change my house decor to celebrate the arrival of Fall.
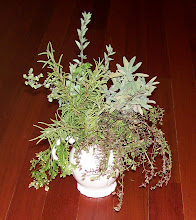
 Goodbye Summer.
This would also be a good time to clean the table and slip the extra table leaf in since the Foodie Daughter's boyfriend regularly eats dinner with us.
Oh heck, let's just go all out and fix those broken chairs while we're at it too. After all, I have been meaning to get a Round Tu-it...
 There, much better. A clean table, Fall decor, more room and fixed chairs.
Next project:
 You know, it occured to me the other day that I don't have a Fall wreath. Well, I should do something about that, shouldn't I?
Here I have an 18" grapevine wreath and some various items I purchased at the craft store.
 After I held the wreath up and decided which was the front and which was the back and which way was up (yes, this is very important), I needed to make a hook to hang the wreath.
I looped a pipe cleaner in half.
 Then twisted it once.
 Then I tucked it behind a couple of sturdy vines on the top back of the wreath.
 Then pull the ends back through the loop.
 Bring the ends around one side of the loop.
 And back around the other side. Continue before tucking the ends back into the wreath.
 Now you have a sturdy hanger for your wreath.
 I use a wreath holder that is typically used for cemetaries to hold the wreath while I work. Just be careful to not wire the wreath to the holder (and yes, I have done that before).
 Now I began placing the items I bought on the wreath to see how I might like them arranged.
Something's not right. I did find a large roll of ribbon in the basement. Let's start with a bow.
 Please thank the Foodie Daughter for taking these pictures before she ran out to football practice.
 Please thank the Foodie Daughter for taking these pictures before she ran out to football practice.
First I made the center loop for the bow. Then twist the ribbon so that the right side faces front.
 Make the first loop and twist again. Then grasp tightly with the hand holding the center loop. When first learning to make bows, it is often necessary to actually measure the loops to ensure that they are even. I have made thousands of bows by now, so I don't need to measure any more.
 Continue side to side, until the desired number of loops have been made. Always make an odd number of loops per side. For this bow I made seven loops per side.
 This takes lots of practice, but ribbon is forgiving and wrinkles can be smoothed out before trying again.
 Now I'm ready to make the tails. I decide how long I want them to be; cut the end and bring the end up to the center.
 Now a sturdy wire goes through the center loop and around the back.
Needle nose pliers make a tight twist in the wire so the bow is now secure.
 Now I fluff the bow.
 Before placing it where I want on the wreath. I used the ends of the wire to secure it to the wreath.
 The next step was dry fit the items on the wreath so that I could get an idea of where I wanted them to be. This might work.
Then I got busy with the glue gun.
 Not bad. Not bad at all.
 Make the first loop and twist again. Then grasp tightly with the hand holding the center loop. When first learning to make bows, it is often necessary to actually measure the loops to ensure that they are even. I have made thousands of bows by now, so I don't need to measure any more.
 Continue side to side, until the desired number of loops have been made. Always make an odd number of loops per side. For this bow I made seven loops per side.
 This takes lots of practice, but ribbon is forgiving and wrinkles can be smoothed out before trying again.
 Now I'm ready to make the tails. I decide how long I want them to be; cut the end and bring the end up to the center.
 Now a sturdy wire goes through the center loop and around the back.
 Needle nose pliers make a tight twist in the wire so the bow is now secure.
I cut the tails on the diagonal so that they were about equal in length.
 Now I fluff the bow.
 Before placing it where I want on the wreath. I used the ends of the wire to secure it to the wreath.
 The next step was dry fit the items on the wreath so that I could get an idea of where I wanted them to be. This might work.
Then I got busy with the glue gun.
 Not bad. Not bad at all.
My work here is done.


4 comments:
Very pretty!
Sandra Lee would be so proud of you!
I don't know, Rosie. I think this would be a FAIL in Sandra Lee's eyes. After all, I left entirely too much room on the table for the food!
I still think you have lovely hands.
Post a Comment