Friday, October 28, 2011

An Autumn Dinner:
Homemade Applesauce and
Apple-Glazed Pork Loin

I recently found a lovely pork loin on sale 
at my local grocery store (sorry, Sandra Lee speak:
what, would I travel to someone else's local grocery
store to buy food?)
That got my mind grinding and sparking
on an Autumn menu.
Pork and apples.
The food of the Gods.
I can taste it already.


The first task was homemade applesauce.

I used Honeycrisp apples.
These apples are my favorite apples.
They are sweet and they keep almost forever.*
I have been able to keep these beauties in the
crisper of my fridge for over a year, with little
discernible loss in quality,
other than a slight bruising of the flesh.
They still taste good and are good for cooking.

*Forever may be subjective and 
cannot be qualified in legal terms.

Sarah's Applesauce Recipe

4 apples, peeled, cored and chopped
3/4 cup water
1/4 cup white sugar

1/2 teaspoon ground cinnamon


Combine all ingredients in a saucepan and
cook over medium heat for 15 to 20 minutes,
or until apples are soft.
Allow to cool and mash apples with a fork or
potato masher.


This is my new favorite applesauce recipe.
Thanks, Sarah.
(Folks, this may be a first:
I actually followed the recipe!
And you didn't think it could be done.)


Next up was an Apple-Glazed Pork Loin.

Of course, I couldn't stick with the recipe here, 
starting with the brine.

Here is my riff on the recipe:
Brine:
4 cups water
1/4 cup kosher salt
1/2 cup light brown sugar
1 bay leaf
1/4 cup cider vinegar*

*Whoever heard of a brine without an acid?

Pork Loin:
1 boneless pork loin
 Freshly ground pepper, to taste
1/4 cup fresh sage, chopped
2 tablespoons extra virgin olive oil

Glaze:
2 tablespoons whiskey
2 tablespoons apple jelly
2 tablespoons F.R.O.G. preserves.**

**Fig, Raspberry, Orange, Ginger preserves

Nuke the brine in microwave-safe container
on high for five minutes.
Take out and stir, stir, stir, 
until the salt and sugar are completely dissolved.

Add ice cubes and cold water 
to the hot brine to bring the brine to room temp
and to double the volume.

Then and only then can you safely add the pork to the brine.
Submerge the pork in the brine completely for at least four hours.
Since we have added acid to the mix, we have cut down
the brining time significantly.
Place in the fridge.

One to One-and-a half hours before
it is time to start cooking the pork,
take the pork loin out of the brine
and leave out at room temp.

Season the pork with the ground black pepper and sprinkle with
the minced sage.

Heat grill and place pork loin on preheated grill.

Cook until the internal temperature reaches 140 degrees
and not one degree more.***

Do not make me hunt you down!

Trust me on this!

Baste with the glaze at the last minute,
lest the pork burn excessively.

Remove from heat,
cover and let rest for five to ten minutes
before carving.
***Despite what your lovely grandmother may have told you, 
pork does not need to become hard and tough
like shoe leather to become edible.
With today's food safety practices
pork is perfectly safe 
cooked at 140 degrees,
before carry over heat adds an additional 5 to 10 degrees.
And the reason we all worry about undercooking pork?
That nasty little tape worm,
or teniasis****, used to thrive in pigs,
thanks to the fact that pigs were historically fed
scraps and garbage.
Now their diets are vastly improved
and science has shown that
heating the meat to 138 degrees
will kill the eggs of this nasty parasite
if it manages to manifest in the modern
porcine population.

Recently the FDA has relaxed
its rigorous standards
and has suggested that
pork can be cooked to 145 degrees.
I still maintain that this is overkill,
as the final resultant temperature would be 155.

Pork should be just slightly pink in the middle
and oh, so tender.
Try this and you will be a convert.
Just don't forget the meat thermometer.

****Oddly enough,
it is rumored that around the turn of the 20th century,
there were tapeworm diets available
for those wishing to lose weight.
Whether or not that is actually true
has not been determined,
but it would have to have been a desperate person
to have even contemplate such a thing.
EWWW!



Wednesday, October 26, 2011

Greek Tacos

One of the few prime-time Food Network shows
that I will actually watch is the Food Network Star.
Up until this past season,
it had been called the Next Food Network Star.

Why the name change?
Who knows.
But then again,
many of the decisions of the powers that be (TPTB)
don't seem to make much sense at  the Food Network
these days.

The winner of this year's the Food Network Star
is Jeff Mauro, the self titled Sandwich King.

He claims that he can make any meal into a sandwich
and any sandwich into a meal.
His prize for winning the competition was a
show that would last six episodes.

Jeff proudly put forth his six episodes of
"Sandwich King".

I do believe that FN was happy enough with him
that they renewed the show.

And now let's look at the food.


One of the recipes Jeff presented was his version of a gyro.
Since it is not truly a gyro, made in the traditional method,
Jeff called it Greek Taco!

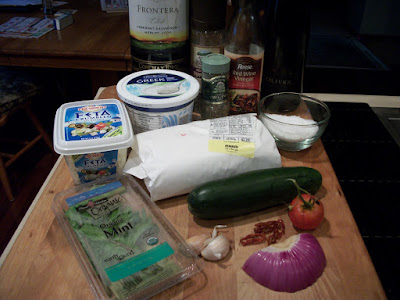
Here are the ingredients,
with my substitutions noted.

Lamb:*
1 tablespoon olive oil
1 pound ground lamb
kosher salt and ground black pepper
1/4 red onion, minced
1/2 teaspoon dried oregano
2 cloves garlic, grated
1/2 tablespoon tomato paste**
1 tablespoon dry red wine

*I halved this part of the recipe
**I used 1/2 tablespoon minced sun-dried tomatoes instead.

Feta Mint Tzatziki:
1/2 cucumber, peeled, seeded and diced
salt
1 cup whole-milk Greek yogurt
1/2 cup feta cheese
1 clove garlic, grated
2 tablespoons minced fresh mint

Cucumber Tomato Relish:
1 tablespoon extra-virgin olive oil
1 tablespoon red wine vinegar
2 firm tomatoes, seeded and diced
1/2 cucumber, peeled, seeded and diced
1/4 red onion, diced
freshly ground black pepper

The Bread:
4 non-pocket pitas, oiled and lightly grilled on one side


Brown the lamb in oil over medium-high heat.
Sprinkle with salt and pepper and cook until the lamb
gets golden brown.
Lamb is very fatty,
so I drained the fat off so that the meat 
would actually brown instead of simply steam.
For this pound of meat I drained off 1/2 cup of fat.


While the lamb was cooking,
I made the cucumber tomato relish.
Mix together and set aside.

I also made the Tzatziki sauce
and put that in the fridge to let the flavors meld.


After the meat was nicely browned
I removed the meat from the pan and set it aside.


The recipe called for the onions to be sauteed 
in the lamb juices, 
but lamb fat is rather strongly flavored,
so I discarded that and used olive oil instead.


Once the onions had softened,
I added the oregano and garlic and cooked that for 
another minute.
Then I tossed in the minced sun-dried tomatoes
before pouring in the red wine.

Add back in the meat and stir together.


The meat mixture is now ready.


Spread the tzatziki sauce on the warmed pita 
before adding the other sandwich components.


Eat and enjoy.

We decided that we didn't care for the feta in the tzatziki,
but other than that,
this recipe is a keeper.

The flavor profile is very close to a gyro.
But this is a gyro you can make at home.

Sunday, October 23, 2011

Cincinnati Chili

Let's face it.  It was a crappy week, weather-wise.

It was rainy.  The temps refused to rise out of the 40s.

In other words, it was a perfect week for chili.
It was an even better week for Cincinnati chili.

It is easier to find recipes for Cincy chili than
to find the story behind the chili.

This from Urban Dictionary.  Don't make me hunt you down.
"This culinary barbarity from Cincinnati, Ohio is really a hoked-up spaghetti sauce that consists of a faux weak chili flavored with spices such as chocolate, cinnamon, allspice, and possibly Worcestershire.

This goop is spooned on pasta (of all things!) and topped off with ingredients such as chopped onions, shredded Cheddar cheese, beans, and crushed oyster crackers. Cincinnatians who specify Five-Way Chili get the works: all of that." 


Forget that, I will hunt you down. 
After all, these people have obviously never tasted the goodness that is Cincy Chili.
Heathens.

Heh, I have a new hobby now.
It's always good to have a hobby.


The ingredients:

 1 /2 cup onion, chopped
1 pound ground beef
1 clove garlic, grated
1 tablespoon chili powder
1 teaspoon ground allspice
1 teaspoon ground cinnamon
1 teaspoon ground cumin
1/2 teaspoon red (cayenne) pepper
1/2 teaspoon salt
1-1/2 tablespoon unsweetened cocoa
or 1/2 oz. grated unsweetened chocolate
1 (15 ounce) can tomato sauce
1 tablespoon Worcestershire sauce
1 tablespoon  cider vinegar
1/2 cup water

1 (16-ounce) package uncooked dried spaghetti pasta

Toppings (see below)


In a large frying pan over medium-high heat, 
saute onion, ground beef,
garlic and chili powder until ground beef 
is slightly  cooked.  Add allspice, cinnamon, cumin, 
cayenne pepper, salt, unsweetened cocoa or chocolate, 
tomato sauce, Worcesterhsire sauce, cider vinegar, and water.  
Reduce heat to low and simmer, uncovered, 1-1/2 hours.  

Remove from heat 
Cook spaghetti according to package directions 
and transfer onto individual serving plates.

Ladle chili over spaghetti and serve with toppings of your choice.

Shredded chedder cheese
chopped onion
Kidney beans


The spices go in with the meat.


And now the cocoa.


The remaining ingredients go into the sauce.

This is a rich and complex sauce.

This is not a one or even a two note sauce.

And forget the idea that spice equals heat.


Cincinnati Bowl - chili in a bowl - duh!
Two Way - chili and spaghetti
Three Way - chili, spaghetti and cheese
Four Way - chili, spaghetti, cheese and onions
Five Way - chili, spaghetti, cheese, onion and beans

We had the four way, natch.

There is just something comforting about a good chili on a cold, rainy day.

Goop indeed.
Heathens.


Saturday, October 22, 2011

Autumn at McCormick's Creek

This is a trip that has been on my agenda
for a couple of years now.
I had to postpone it last year due to the drought.
No sense in going to see a waterfall
if it was dry.

As the weather was dry this summer
as well, I had to bide my time.
Then it rained and rained earlier this week
and I knew the time was right to visit
McCormick's Creek.

I had hoped that the Foodie Daughter 
would be coming along with me,
but she had to work.
Oh well, I'll just have to go it alone then.

Remember;
do as I say and not as I do.
Don't take pictures as you drive.


Fall foliage on the drive to McCormick's Creek.


These are the remains of several quarries that opened 
in the 1890s.  


Stone from these quarries was used to build 
the Immigration Center at Ellis Island.


A line of American Sycamore trees.


McCormick's Creek was Indiana's first state park
and was established in 1916.


Looks like it is busy today.


I have my annual park pass ready.


The sign says that the caves and sinkholes are closed
in order to help protect the park's bats
from White-nosed syndrome, 
a fungus that is killing bats in large numbers.


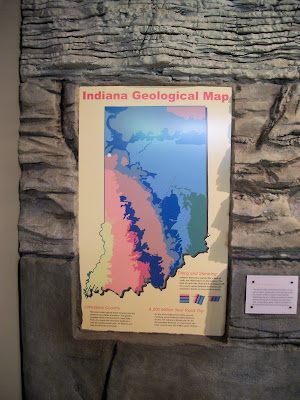
I stopped in at the nature center first.


Geodes.
We have those.
I can't dig in my garden without finding a geode.


Karsts are common in limestone country.

A karst is essentially an underground cavern, 
to put it simply.


I was here for the falls,
so I headed over to the canyon 
and began the journey down.


The falls from the overlook.


Looking across the canyon.


At this point I could have played it safe and stayed 
on the concrete pad,
or I could have made the treacherous journey
across the creek so that I could get better pictures.
Three guesses as to what I chose to do
and the first two don't count.


Colorful fungus on a fallen log.


Be a good steward and make sure that the
only things you take with you are memories and photos.


Looking up.


Looking downstream.


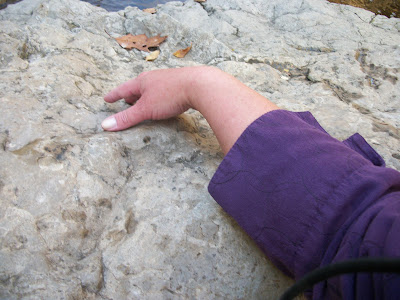
Fossils in a rock.


If you look very carefully, 
you will see that someone at sometime
scratched the skeleton of a fish on this rock.


More fossils.


After half an hour
I finally made it around to the other side of the creek.
Arrow-leaved aster.


Interesting pattern pressed into the surface of the rock.


Back where all those people are is where I started out.


The falls, up close and personal.

The falls are only about 12 feet tall, but they are lovely.


Now I just have to make my way back.

But for now I am taking a break.
Right here on a big rock in the middle of the creek.


This big rock.
After almost falling into the creek
I think I deserve a rest.


Whew, I finally made it back up to the top.
It was a lot easier going down than
coming back up.

I did have to take my asthma inhaler after
that major workout.

In all I spent almost an hour climbing up and over and around
rocks and boulders and ducking under fallen trees.

I found a shady place to park and ate 
the small sandwich that I had packed and brought with me
while I caught my breath.
Canyon Inn.
This inn was built on the site where a sanitarium was 
originally built in the late 1800s by a doctor 
who felt that this area was the perfect place for 
"the wealthy and weary to get away 
from it all and recuperate."

I can agree with that,
as I feel refreshed and rejuvinated.