Showing posts with label Herbes de Provence. Show all posts

Saturday, February 20, 2010

Lasagna for Dinner


Once in a while I feel the need for some good lasagna.


Friday was just such a day.


I don't often make this dish


as it is a rather labor-intensive dish involving


several steps and more than a few dirty pots and pans.


The first order of business was to make the sauce.


Now, don't get me wrong;

if you have a favorite jarred pasta sauce,

you may certainly use that.


This time I wanted to make my own sauce.

My assembled ingredients are:


1 can (15 oz.) petite diced tomatoes

1 can (15 oz.) tomato sauce

1 can (6 oz.) tomato paste

1/2 tablespoon dried Herbes de Provence

(hush, they are typically the same herbs

used in many Northern Italian herb blends)

1/2 carrot, grated

1 clove garlic, grated

1/4 cup onion, minced

salt, to taste

sugar, to taste


Not pictured:

olive oil

Italian red wine


Did you notice Minx watching from the table?
Don't worry, he wasn't near any food.
He just wanted to see what was going on in the kitchen.

I sauteed the onion and carrot in a bit of olive oil until translucent,
before adding the garlic and the can of tomato paste.


The diced tomatoes and tomato sauce were added.


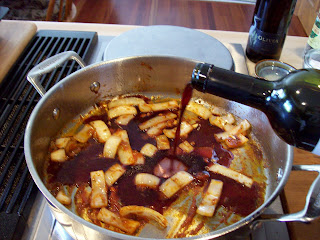
I then decided to add about 1/4 cup of a dry Italian red wine.


The Herbes de Provence were stirred in
before I added salt and sugar to taste.

I allowed this to simmer for about an hour.


It was time to move on to the meats for the dish.
I had planned on adding one pound of ground beef
along with a couple of my homemade pork sausage patties.

Then I saw Rosie Hawthorne's post on lasagna in her blog,
Kitchens are Monkey Business,
so I decided to add the two slices of prosciutto (chopped)
that were left from another dish.

The meats were sauteed until browned
and the fat was drained.


The ingredients for the Ricotta mixture were assembled.
Here I have the Ricotta,
salt,
Herbes de Provence
and a couple of egg yolks
(left over from making beef consomme)

I also followed Rosie Hawthorne's advice and added some salt to the Ricotta cheese mixture.


That's ready.


I also grated one pound of mozzarella cheese
and about a cup of Parmigiano-Reggiano cheese.


After cooking the store-bought pasta*,
I began assembly.
First a layer of tomato sauce,
then the pasta.
Ricotta,
some of the grated mozzarella cheese.
Then more pasta,
sauce,
meat,
pasta,
cheeses (including the Parigiano-Reggiano),
etc. until all ingredients are used.
*I'm no Rosie Hawthorne. I didn't make my own pasta for this dish.


Assembled.
And after dirtying
3 pots and pans and lids,
3 bowls,
1 cutting mat,
2 graters,
1 baking dish,
1 knife,
1 peeler
and several other utensils.
I told you this is labor-intensive
as well as a labor of love.
And there's a reason I only make this once or twice a year.


I baked this at 350 degrees for one hour.
The pan was covered with foil for the first half-hour
(thanks, Rosie Hawthorne, for the tip about using toothpicks.
The Foodie Daughter wondered why
I had never thought of doing so.).


Allow the dish to rest for at least 15 minutes
before slicing and serving.


A fresh salad with Romaine lettuce, red onion,
candied pecans
and shaved Parmigiano-Reggiano accompanied the lasagna.


This was good, but I know it will be even better
when I reheat it for Sunday's dinner.


So good and it was definitely worth all the trouble.


Monday, November 23, 2009

Turkey Cutlets, Two Ways


I had a dream

A dream of turkey cutlets.

I also had a dream of achieving five-star reviews for my turkey cutlet recipe.

Let's just see how that turned out, shall we?

*

Attempt number 1:

Lemon and Thyme Turkey Cutlets


I set up my breading station with flour, an egg wash and the bread crumb mixture in three separate containers.


The zest of one lemon and 1-1/2 teaspoon dried thyme were mixed in with the bread crumbs before the cutlets were coated.


I have found that it is important to bread any meat that you wish to fry at least a couple of hours before you will be cooking it.
After breading, place the meat, uncovered, in the refrigerator for at least an hour.
About half an hour before you are ready to cook, take the meat out of the fridge and allow it to come to room temperature.
Cook as usual.

This extra step allows the breading to properly adhere to the meat so that the coating will not separate or "blow out" when fried.


The turkey cutlets were cooked in oil over medium-high heat until golden brown on each side.
Do not crowd the meat in the pan.
They were then removed to a serving platter.
*
One tablespoon butter and 1/2 cup sherry were used to deglaze the pan and the sherry was reduced before the sauce was poured over the cutlets.


The cutlets were served with roasted potatoes and pea salad.
So how did the ratings go?
I gave this five stars since I liked the balance of the lemon and thyme.
The Foodie Daughter gave it four stars as she thought the lemon flavor was too pronounced.
The Foodie Boyfriend gave it four stars because he thought it needed more zip, more flavor, more spice.
The dear husband thinks that any lemon flavor is too much, so he gave this three stars.
Guess I need to keep working.
*
Attempt number 2:
Spicy Turkey Cutlets


After finding out just what the Foodie Boyfriend meant by "more flavor", I looked through my many bottles of herbs and spices to see what flavors I could bring to this mild-mannered meat.
I decided on a Lemon-Pepper Blend,
Ground Cayenne Pepper
and
dried Herbes de Provence from my garden.
The breading station was set up as before and the cutlets were ready to be cooked.


This time around the turkey cutlets were accompanied by macaroni and cheese and a fresh salad.


And now for the ratings:

The Foodie Daughter, Boyfriend and I all gave this five stars and agreed the cutlets were moist, tender and very flavorful.

The dear husband, who has yet to earn his Foodie designation, gave this three stars,
saying it was "just okay and a touch too spicy."

Sigh, what's a Foodie to do?


Lemon and Thyme Turkey Cutlets

Lemon and thyme flavor these breaded turkey cutlets. A sherry ...

See Lemon and Thyme Turkey Cutlets on Key Ingredient.


Spicy Turkey Cutlets

Breaded turkey cutlets are seasoned with a mixture of herbs ...

See Spicy Turkey Cutlets on Key Ingredient.

Wednesday, April 1, 2009

Pot Roast, Round Two
Yes, I know that I have blogged about pot roast before, but given my penchant for working without a net (ie, without a recipe), this dish never turns out the same each time I make it. So let's try this time, shall we?

While at my friendly warehouse discount store recently, I picked up a package of two nice chuck steaks for about $11.00. Not too bad a price for two large roasts.

A pot roast sounds like just the thing for today's dinner. And I happen to know that my husband loves pot roast...

The ingredients this time are black pepper, homemade beef consomme, dry red wine, bacon joos (bacon grease to the non-Sandra Lee's out there), beef chuck roast, carrot, Yukon Gold potatoes, garlic, tomato paste, Herbes de Provence, kosher salt and yellow onion.

A tablespoon of bacon grease with a tablespoon of olive oil are heated in a pan before the chuck roast is added. A liberal sprinkling of kosher salt and black pepper season the meat. I wish to point out to those who might cringe at the amount of salt here, that this is all the seasoning the dish will receive. Seasoning is relative, folks, so please relax. And I say this as someone who doesn't like a lot of salt in her dishes.

I seared the meat in a stainless steel pan, so I had to be patient while I waited for the meat to 'release' from the pan.* Now's a good time to clean the kitchen...
*Seriously, don't try to rush this step. Trying to pry the meat off the pan would only result in torn, tough meat. You don't want that. Trust me on that point.


The meat has been seared on both sides and placed in the slow cooker. Now the onion is sauteed in the pan over medium heat.


Let's add about a teaspoon of Herbes de Provence to the pan so that the essential oils can be released.


Now, about two tablespoons of tomato paste are allowed to saute in the pan. At this point, the minced clove of garlic is added.


Quickly, about 1/2 cup of a dry red wine is poured in so that the pan can be deglazed before the garlic can burn.


Use a spatula to scrape the fond from the bottom of the pan.


This is all put into the slow cooker and allowed to simmer for several hours.


Meanwhile, some Yukon Gold potatoes and a carrot were cleaned, peeled and chopped before being stored in cold salted water. The veggies were added to the pot roast about noon-time.


It's noon and the veggies have been added to the slow cooker. Simmer, simmer, simmer...


Six hours later and the pot roast is ready for us. Well, what do you know? We're ready for the pot roast, too. That just works out well now, doesn't it?


I like the looks of this meal.


Beef chuck roast, cooked to perfection. Tender, moist and succulent.


Carrots, onions and potatoes. Tender and not yet mushy. That scores in my book. Hey, if I can't have tender-crisp, I'll settle for tender and yet not mushy.


Noodles, cooked and tossed in melted butter with salt and more Herbes de Provence.
And what do you know? I got called out on this dinner because I didn't offer mashed potatoes so that we could have that Darke County classic dish. I'm sorry, dear daughter, but I didn't have enough potatoes to make mashed potatoes. But there are sure to be left-overs.*
*Psst, it was still all good. And I don't even really like pot roast.


Tuesday, August 19, 2008

Herbes de Provence, Part Deux


My dear friend Rosie Hawthorne of Kitchens Are Monkey Business blog fame has requested that I blog the process of making a batch of Herbes de Provence.


Despite what you may have heard, there is no one recipe for making this herb blend. Traditionally, each homeowner in the Provence region of France would simply add the herbs that they had growing in their gardens at that particular time.


For this particular batch, I had basil, dill weed, flat-leaf (or Italian) parsley, oregano, rosemary, sage and thyme. Cut your herbs early in the day before the essential oils have dissipated in the heat of the day. Use twine or rubber bands to secure the bunches. Hang upside down to dry in a cool, airy location that does not receive direct sunlight.


I cut fresh herbs yesterday morning for another batch of Herbes de Provence. Here I have (left to right) thyme, flat-leaf parsley, sage, oregano, basil and rosemary. I really need to make a dedicated herb drying rack. But until then, this works for me.

Other herbs that are traditionally used in Herbes de Provence include lavender buds, marjoram, bay leaves, chervil, tarragon, summer savory, and even mint. Now, some people insist that lavender must be added for it to be an authentic Herbes de Provence. But, as this is my house and my lavender plants all died, this batch is lavender-free.


Allow to dry for several weeks until thoroughly dry.


Once dry, strip the leaves from the stems and pulse in a mini food processor until finely chopped. Alternately, the herbs can be chopped using a knife. I will warn you that dry rosemary can be a bit difficult to chop with a knife as it is very stiff and it will tend to jump around on the cutting board.

Store in an air-tight container for up to a year. Keep in a cool, dry, dark place.

Herbes de Provence works nicely in egg dishes, as well as with potatoes and meat. Experiment with your own blend to find your new favorites.

Sorry, Rosie, but this herb blend was gerbil-free.* Every time I tried to plant the gerbils, they kept digging themselves out and running off.

*Just an inside joke for those of us who love to make fun of Sandra Lee and her mispronunciations on Semi-Homemade Cooking with Sandra Lee.

Sunday, May 4, 2008

Salad Days
Since visiting our local Turkish restaurant, Anatolia, recently, I have had a strange desire to make tabouli, tabouleh, tabbouleh... Yes, they are all the same thing, but apparently the spelling, as well as the recipe, changes according to the country. Oh, yeah... anyway, here we go.


Given my available ingredients, I went with: 1 cup bulgur wheat soaked in cool water for 30 minutes, one tomato, diced, 1/2 shallot, diced, 1/2 cucumber, diced, mint, parsley (unfortunately, my Italian parsley is in great demand and not growing fast enough to meet demand), olive oil, lemon juice and cumin (alas, I only have whole cumin seed, not ground, but we make do).


The bulgur wheat is soaking. Exciting isn't it?


The mint leaves are ready to chop. But here's the easy way to do it...


Tightly roll the leaves lengthwise and then thinly slice. This is called a chiffonade, by the way. Now, aren't you the smart one?

Then you can chop the chiff0nade of mint for the salad.

All the veggies are ready for the tabouleh salad.


The dressing has been added and the salad chills for 2 hours before serving.


Now at this point, you can either eat the tabbouleh salad over lettuce or on bread. Somehow I managed to do both - at the same time. Hey, I'm special!

And now on to dinner:


Look, xmaskatie! I harvested all these greens (as well as the chives and their blossoms) from my garden pots. Just soak the greens in water to drown all the little bug-wuggies first and then drain (or as Sandra Lee would say, strain).

I love to add the chive blossoms to salads this time of year. And yes, they are edible. They add a nice peppery, onion-y flavor to the dish, and as they are only available this time of year, I relish their addition to my food.


I started with one recipe and of course ended up with an entirely different recipe. Such is the way of my life.

Here I toast the remaining focaccia from earlier today. A reminder: this is no longer a wine bottle, but rather a bottle of extra virgin olive oil. The round bottle holds my own blend of Herbes de Provence from last year's garden.


Drizzle the olive oil over the bread cubes.


Sprinkle the Herbes de Provence over the croutons and bake in a 300 degree oven for 20 minutes. Watch carefully, as these can burn very quickly and every oven is a demon (er, varies significantly in its function, yeah, that's it...).

Yay, I win!


And now the first part of the dressing: 2 tablespoons of white wine vinegar, 1/2 shallot, diced and ground black pepper.


See, that wasn't so hard, now was it?


Cook 3 slices of bacon, diced, over medium heat. Pour the bacon and the fat over the salad. Now, relax. Recent studies may suggest, if you look squinty-eyed at them, that this fat is better than trans-strangulated, re-hydrolated, re-hyphenated, man-made-up fats. And besides, how often are you likely to eat this dish? Hmm? So just relax and enjoy. Besides, the rest of this dish is very good for you.*

*The blogger can hardly take care of herself: she certainly cannot take responsibility for your health. So there.

Now, don't you feel bad for even thinking about not eating this?


And this is the finished dish: four sea scallops and one shrimp, seared to perfection, along with a freshly harvested chive blossom. This was so good. I can't even begin to tell you. But, sorry, I'm not sharing. It was that good.