Friday, September 26, 2008

The Third Time's the Charm

I think I'm finally getting the hang of this stock-making thing. While doing some research on the internet, I discovered that older beef stock recipes assume that you are using meaty beef soup bones. However, the soup bones I have been seeing in the stores are scraped clean of any meat. Thus, I may need to rethink my approach to making beef stock. I found a Williams-Sonoma Beef Stock recipe that appealed to me, so I got to work. The obvious first step was to shop for some nice, meaty bones. For this purpose, I decided to purchase some beef short ribs.


Here are the beef short ribs, along with some short rib bones and a rib eye bone that I had saved and frozen, ready to go into a 450 degree oven for 90 minutes.


Meanwhile, I prep the aromatics for the stock. I have one celery rib, along with some celery leaves. Don't throw the leaves out, folks, as they impart a strong celery flavor to the stock. One carrot is roughly chopped along with one onion. I didn't have a leek, but I did have green onions on hand, so INto the pot it goes. I went out to my deck and cut some fresh thyme, flat-leaf parsley and oregano (honestly, your honor, it's not my fault I can't follow a recipe!). I also picked two small Roma tomatoes and a fresh bay leaf from my garden. Three garlic cloves, some black peppercorns and oddly enough, two whole cloves round out the ingredients list.


I deviated from the recipe by adding the onion, tomatoes, carrot and garlic to the roasting beef and bones 15 minutes before the timer was set to go off.


Remove the beef, bones and veggies to the stock pot and drain the fat from the roasting pan. Set the 'dirty' pan aside for later.


Hmm, what are we missing? What could it be?


That's right: water! Add enough water to the pot so that the beef is covered by 4 inches of water. This pretty much filled my stock pot.


Cook over medium heat until the stock begins to boil. This may take up to 1-1/2 to 2 hours. Turn the heat down to medium-low and add the remaining aromatics. I chose not to roast the green onion so that it would add another flavor component to the stock.

Now, this simmers for 4 to 8 hours.


Ah, I see you remembered the roasting pan with the 'dirty' bits on the bottom. Add 2 cups of water and simmer over medium heat, scraping the bottom to loosen the fond from the pan. This liquid should then be added to the stock.


Skim off the scum that forms on the top of the liquid occasionally.


Eight hours later the solids are removed and the stock pot is placed in a sink of ice water so that the stock can cool quickly.


Having given up all the flavor, this is now going into the trash.


Once the stock has cooled, strain through a cheesecloth-lined strainer.


At the end of 12 hours I have two quarts of lovely beef stock. Store overnight in the refrigerator for Act 2: Consomme.


Isn't science fun? Thanks to the prodigious application of cold to the stock, the fat has congealed on the top. Now, skim off the fat.


Reserve one cup of the stock and add one egg white. Looks like I have an egg yolk for my breakfast.

Bring the remaining stock to a simmer. Again, this will take a while. Be patient.


Once the stock has reached a boil, reduce the heat and add the one cup stock with the egg white to the pot. Set the timer for 5 minutes and pull the pot off to the side of the burner. At the end of the time, turn the pan one quarter turn and set the timer for another 5 minutes. Repeat two more times, for a total of 20 minutes.

Take off the heat and skim off the solids. Strain through a cheesecloth-lined strainer.


And here we have 4 cups of beautiful beef consomme. Many thanks to Rosie Hawthorne for pointing me in the right direction here. Of course, I can't promise to not veer off course once in a while.

Korean Barbecue Boneless Pork Ribs

Having recently become enamoured of Korean Barbecue Pork, I decided to try my hand at making some at home. I found a recipe on the internet that sounded promising, so I set to work. The first step actually begins the day before as the ribs must marinate for 24 to 48 hours before cooking.


The recipe calls for:

Boneless pork ribs

1/2 tsp. red pepper flakes

1/2 cup soy sauce (I recommend using low-sodium soy sauce)

1-1/2 tsp. sesame seeds

1/2 tsp. cracked black pepper

2 tbs. sesame oil

1/4 tsp. fresh ginger root, minced

1 green onion, finely chopped

1 clove garlic, minced or grated

2 tbs. brown sugar

The recipe also calls for 1/8 tsp. msg, but I omitted this ingredient.


The first step is to prepare the meat.


Cut the meat into thin strips. I later cut the meat into even thinner and shorter strips. It is a good idea to cut the meat when it is still partially frozen. I need to remember that for the next time. It would have made my life a bit easier.


After mixing all the marinade ingredients together, add the cut meat and seal the bag. Remove as much of the air from the bag as possible and place in a container in case of leakage. Refrigerate for 24 to 48 hours, turning a couple of times.


Heat oil in a skillet over medium-high heat. Saute the meat in batches.


You want the meat to become caramelized, but not burnt.


After each batch was cooked, I removed the meat to an oven-proof dish and set in a warm oven.


Meanwhile, we cooked some Jasmati rice and made pea salad to accompany dinner.

This was the moistest and most tender pork I have ever eaten.

Unfortunately, the dish was a bit salty even using low-sodium soy sauce. My daughter suggested that next time we add more sugar to "cut" the saltiness of the dish. I have already rewritten the recipe, increasing the amount of brown sugar to 1/4 cup.

We will be making the amended recipe again.

Monday, September 22, 2008

Herbal Delights (or what to do with those herbs you are growing)

There is one particular thing I have been wanting to do for years. After many years of waffling on the matter, I decided it was time to just do it already. Now, should I let the fact that my family will likely turn their noses up at the results or the fact that I have never, ever canned food before deter me? Nah, not this time. With that thought in mind, I searched for a nice basil jelly recipe that even I couldn't mess up - much.


It has been a good year for basil. And can you believe that even with all this, I still had to go out and cut some more to get the requisite 2 packed cups?

Here we have 5 cups of white sugar, 1 quart water, 1 package (1-3/4 ounces) powdered fruit pectin, green food coloring (optional) and the aforementioned 2 cups firmly packed fresh basil leaves, finely chopped.


I bring the basil and water to boil in a large saucepan.


Meanwhile, I had washed the canning jars and lids in hot, soapy water and now heat them in a large pan that is filled with water. Hmm, seems that after 10 years somebody finally figured out that she could heat pans on her stove top grill. Hey, they don't call me bright for nothin'. Excuse me while I go bang my head on a nearby wall.


The basil has turned a darker shade of green by the time the water comes to a boil. Now, remove the pan from the heat and cover. Allow to sit for 10 minutes.


After the 10 minutes are up, strain the liquid and discard the basil. And isn't this an appetizing color?


Return 3-2/3 cups of the liquid to the pan. Stir in the pectin.


Add the radioactive-green food coloring. After each drop, stir until you decide whether the color is right or it needs more coloring. Geez this tube is hard to squeeze.

Return to a rolling boil over high heat.


Pour in the sugar. Boil for 1 minute, stirring constantly. Remove from the heat and skim off any foam that gathers on the surface.


I finally get to use my grandmother's old canning funnel for canning. She'd be so proud of me.

Leave 1/4 inch head space in the jar.


Cap, but don't screw the lid bands on too tightly.


At this point the covered jars get put back into the water bath and the whole thing is boiled for 15 minutes in order to kill any bug-wuggies. Can I tell you how noisy this necessary step is?


Remove the pan from the heat and allow to cool. You will begin to hear the lids popping as they seal. Do not be alarmed. This is good.


Once the jars in the water bath have cooled a bit more, remove the jars to a safe location so that they can continue to cool. I placed the jars on a towel on my dryer so that they were out of the way.


The next day, test the seals by lightly pulling with your fingers. You do not want to pry the lids off; you just want to make sure they are secure. I found that one jar was not properly sealed, so that was tossed.


I had a bit left over for immediate consumption.

And what did I tell you? My family's reaction was definitely 'meh'. The culinary heathens.


Basil jelly, while sweet, has a bit of a grassy taste to it. Good, but different. I understand that it pairs well with cream cheese on crackers. And as it seems that I will be enjoying this herbal delight alone, I will be looking for different ways to use basil jelly.

Sunday, September 21, 2008

Herbal Pleasures

I had decided that it was time to once again harvest some of my herbs. As fall is rapidly approaching, I need to get to work on laying aside a supply for the winter months. And do remember that it is best to harvest the herbs on a dry morning so that the essential oils are at their strongest. It is also important that the herbs be dry to prevent the growth of mold. Cut herbs should be dried in an airy place that does not receive direct sunlight.


Here are a couple of my herb pots. On the left is the remains of my flat-leaf (Italian) parsley. The plant is already started to recover from the visit of the black swallowtail butterfly caterpillars. See, I told you they would be gone soon. Do you like the petunia that self-seeded there?

On the right is a pot of thyme, chives and oregano. This is the third season for the thyme and the chives. Hopefully, the oregano will overwinter also.


My rosemary plant is beginning to flower. This pot will come inside this winter as rosemary does not overwinter well in our area.


The pot on the left holds a Roma tomato plant and two basil plants. Tomato and basil plants are good planting partners as they can keep some diseases and pests away from their partners. The pot on the right holds a bell pepper plant, a serrano chili plant and a 'Bush Goliath' tomato plant.

Not shown are a pot containing sage and a bay plant and a pot containing basil, flat-leaf parsley and a serrano chili.

As you might have guessed from the pictures, all of these pots are on my back deck. The deck faces south and has easy access to my kitchen. Now, I don't garden in pots due to a lack of space given that we live on an acre of land. Rather, I chose to garden this way because I can easily water and harvest the plants. Since we live on a southern slope, with thin soil over limestone, water is a major issue with gardening here. Let's just put it this way: Southern Indiana is not known for farming.


You might also recall that I had earlier promised myself that I was going to make or buy a rack for my herbs. This is much nicer than my former system. While this rack is still in my laundry room, it is up and out of the way and out of any direct sunlight. For less than $20 I was able to purchase this coat rack and the "S" hooks. And I must say that it works wonderfully.

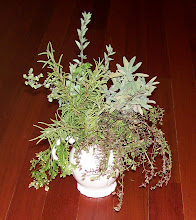
Do you like the herbs that I harvested today? If you are interested, from the left we have sweet basil, oregano, thyme, rosemary and sage.

Wednesday, September 17, 2008

Easy as Iced Tea

Now, I love iced tea and I even went so far as to buy a certain *cough - Joe DiMaggio* iced tea maker, but both iced tea pitchers provided soon broke, resulting in annoying leaks on my counter tops. Amazingly enough, it was my dear husband who gave me the answer to my problem. "Use your coffee maker!" he said. And what do you know? That very, very dim, nearly dead light bulb came on over my head.


When I recently had to buy a new coffee maker, I also got an extra carafe and filter.

My particular coffee maker has a 12 cup capacity. I fill the carafe and add the water to the coffee maker. I also have a one gallon pitcher that I fill to the brim with ice. Four family size tea bags are at the ready. For personal reasons, I prefer decaffeinated iced tea.


At this point, I secure the tea bags in the coffee carafe.


Set the carafe in place and allow the cycle to run. As the hot water runs into the carafe, the tea bags go to work.


After the cycle has run, carefully pour the concentrated tea mixture into the ice-filled pitcher. The ice will melt, thus diluting the mixture to the right consistency.


Now, this is important: Do not squeeze the tea bags. Doing so will release bitter compounds into the mixture. Just drain and toss. Trust me.


And at this point you can either add fresh lemon juice or peppermint extract (one teaspoon extract per one gallon of iced tea). I would not recommend adding both, but that's just me.

All that is left at this point is for you to enjoy your freshly brewed iced tea.

Thursday, September 11, 2008

A Hoosier Favorite

As I now have a real meat mallet to play with, I decided that I really had to make that old Hoosier standard: a breaded pork tenderloin sandwich. And besides, whacking the meat is a great stress reliever.


This is a very simple recipe, folks. Just flour, salt, pepper, pork loin chops and an egg. That's it.


For some odd reason, my regular grocery store only had bone-in pork chops this day, so I bought a package and trimmed the meat off the bone myself. I also trimmed off most of the fat and set that aside.

I have my meat mat out and put down a large piece of plastic wrap. First I sprinkle some water on the wrap and then I place the now boneless pork chop on one side. I fold over the plastic wrap and go to play, er, work.

As you strike the meat with the smooth side of the mallet, slide the mallet out toward the edge of the meat. Turn the meat as you pound, so that the meat is a uniform thickness.


The meat ends up being about twice as large afterwards.


Next, I dredge the meat lightly in flour before coating in the egg mixture. I add a bit of water to the egg, some salt and pepper and stir to blend.


Now it gets messy. After the meat is coated in the egg mixture, dredge in more flour.

No matter how careful I try to be, I always end up with club hands. Oh well, that's what soap and water is for.


Repeat until all the pieces are coated.


Now, this step is important. Once the meat has been breaded, place in the refrigerator for at least an hour. This allows the coating to dry out a bit so that the coating will stick to the meat better once it is cooked. The trimmed pieces of meat and fat sit on top of the meat.


And now it's time to cook. You will want your oil to be at about 375 degrees.

First I fry the trimmings for the cat and the cook to munch on. Hey, nobody said this was health food.


Now it's time to fry the pork tenderloins. This doesn't take long at all, so don't go wandering off.


And now I proudly present to you the Hoosier Classic: a breaded pork tenderloin sandwich. I like mine with a bit of catsup, yellow mustard, pickles, lettuce and onion. Enjoy.